Food 101: Easy Christmas Treats

24 Dec

Hey Webbies,

Christmas time always seems to be a busy time of year. Here are two quick and festive recipes that I like to make when I am short on time during the holidays.

Peppermint Brownies

Photo via: Kalah

Photo via: Kalah

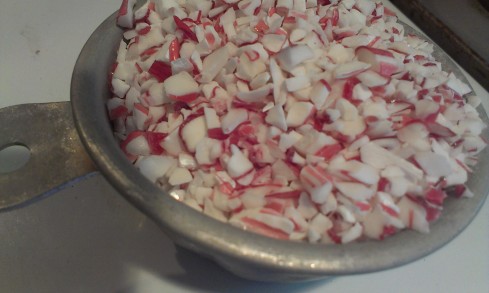
First, preheat your oven to about 350°F. Then, take your favorite box of Brownie mix and follow the directions on the box (this took me about two minutes.) When your brownie batter is all mix together, add in crushed Peppermint Candy Canes (you can crush them yourself or buy them already crushed.)

IMAG0207

Photo via: Kalah

Pour your batter into a greased pan, use a spatula to level the batter. I used an 8×8 pan and baked for about 20 minutes.

**Note: Pan Sizes vary as well as cook times**

Photo via: Kalah

Photo via: Kalah

Once baked remove from oven and let it set to cool. After your brownie and cooled, cut into desired shape and size, and serve. I sprinkled a little powdered sugar over the top of my brownies for a little decoration. Eat. Enjoy.

Prep time: 5 mins.

Cook time: 18-20 mins.

Ingredients:

  • 1 box of Brownie mix (and any ingredients listed on the box)
  • 1/2 C. crushed Peppermint Candy Cane
  • Pam or butter to grease your pan
  • Powder Sugar (optional)

Peppermint Bark

Photo via: Kalah

Photo via: Kalah

Peppermint bark is simple and quick recipe to make which is perhaps why it is a classic Christmas treat. First, buy your favorite melting chocolate of choice. Start with 3-4 cubes of milk chocolate and put it in a microwave safe bowl, heat for 30-60 seconds. If the chocolate is not melted completely until smooth, heat in 15 second intervals. I personally like to add a little bit of Crisco and peppermint oil (seen in lower right of photo) and mix with the melted chocolate. The small amount of Crisco doesn’t change the flavor and it keeps it melted a little bit longer to work with it.

Photo via: Kalah

Photo via: Kalah

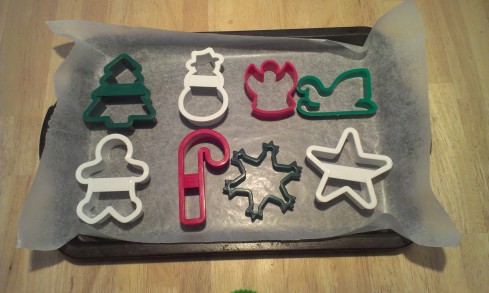
Now comes the fun part! If you would like to make shapes out of the Peppermint bark find your favorite holiday cookie cutters, otherwise you can simply use a jellyroll pan. Lay out a piece of wax paper and arrange your cookie cutters any way you like.

Photo via: Kalah

Photo via: Kalah

Pour the chocolate into the cookie cutters carefully. I did not do it as carefully and my sled seemed to explode. I also would recommend not using a sled shaped like mine seeing as it is hard to fill and get out once you are done filling it. Use your judgment on how thick this layer is, keep in mind you will have another layer of chocolate. Using a toothpick (or anything like that shape) swirl the chocolate around in the cookie cutters to fill every nook and cranny. Doing this, will smooth out the chocolate layer automatically. Let it sit to get firm, or put in refrigerator for faster results. Now, repeat the above steps for the vanilla chocolate.

IMAG0220

Photo via: Kalah

After you melt and pour the vanilla chocolate into the cookie cutters, smooth over with toothpick again. Sprinkle crushed Peppermint Candy Canes on the semi-melted layer of vanilla chocolate. I bought mine already crushed but you can crush them yourselves. Let the final layer harden completely before removing from your shapes. At this point, if you just did the jellyroll pan, break the slab of chocolate that has hardened into pieces. Eat. Enjoy.

Photo via: Kalah

Photo via: Kalah

**Note: I was less-than-gentle to my shapes so some of my Christmas shapes did end up breaking**

Prep time: 10-15 mins.

Cook time: 2-3 mins.

Ingredients:

  • 3-4 cubes Milk Chocolate
  • 3-4 cubes Vanilla Chocolate
  • 1/4 tsp. Peppermint Oil (divided) (Also optional)
  • 1/3 C. crushed Peppermint Candy Canes

Please let me know if you liked these quick recipes. Did you make any alterations? Do you have another recipe that would fit along with these two?

Merry Christmas!

Until next time,

Kalah

How I survived 2013

16 Dec

Greetings Webbies!

It has been one full year from my hiatus of blogging. During this year, I have experienced some clarity slowly developing in my life. You might be wondering what I have been up to.  Here are some of my BIG and small accomplishments for 2013:

  1. I turned 20
  2. One full year in North Carolina
  3. Got my first job ever! (Woo-hoo!)
  4. I am learning how to drive
  5. I got my permit
  6. I was a live-in nanny to a SPECTACULAR  little girl and we HEALED each others SOUL
  7. First mission trip ever (Haiti)
  8. First time ever leaving the US
  9. Visited 2 countries (Haiti and Dominican Republic)
  10. I got to meet amazing new friends
  11. I am becoming more sensitive to the voice of the Holy Spirit
  12. I let go and let God, this year I let God lead me
  13. Volunteering in Children’s Ministry
  14. Babysit in the church’s nursery and for a family from church
  15. I am slowly starting to be comfortable around more people, with feeling only a small amount of anxiety
  16. I am SLOWLY  paying my student loans off
  17. I saved some money and bought my self some furniture! (Yay! Room makeover)

Often, I have a hard time recognizing all the worthy things I am doing. Through the overwhelming sense that my accomplishments do not count because I can always “do better.” Looking back at this past year, I am so grateful for all the opportunities God has given me to learn more. About myself. About my life. About my spiritual walk. About my environment.

So, how did I survive 2013?

God.  Plain and simple.

I learned more about trusting God in the one month before leaving for Haiti, than I did in my entire twenty years of life combined. I survived because I trusted God to give me the strength when I thought I could not go on any longer. God gave me some amazing people this year to help me along and give me the support I needed to keep my focus on him and not the world.

I am learning not to care about the opinions of the world. NO, I am not in college. NO, I do not have a full-time job. NO, I do not have a boyfriend or husband.  NO, I do not know where I want to go in life. Wait for it … and NO, this does not make me any less successful than anyone else.

By the grace of God, I survived 2013. I am grateful for my 525,949 minutes. I hope that I spent more of those minutes serving God rather than myself.

I am praying God will give me the opportunity to keep everyone updated this coming year. My yearlong break from writing has given me the time to sort and rearrange my ever-changing priorities. This past year I lived by “Let go, let GOD.” In the upcoming weeks, I will be praying on this coming year and how God will lead me and use me.

Until next time,

Kalah

The More I Seek You

18 Dec

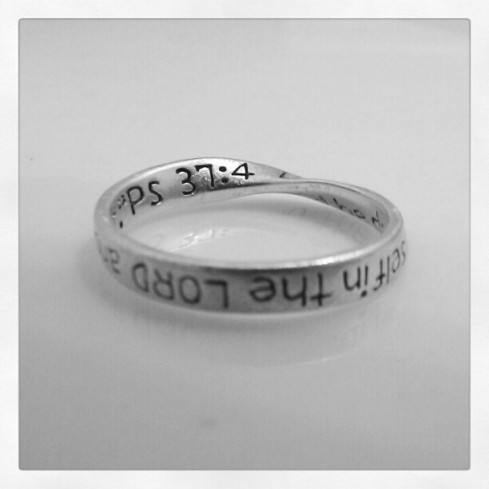
“Take delight in the Lord, and he will give you the desires of your heart.”

~Psalms 37:4

Photo via: Kalah "This is my lovely purity ring."

Photo via: Kalah
“This is my lovely purity ring.”

Hey Webbies,

I have been so busy these last few months, I felt that I needed to stop writing for a bit and focus on seeking God. Let me tell you, He has done multiple things for me in the last month that have confirmed I needed this break to realign my focus. So without further adieu, I’M BACK!! I expect to write a few more posts about what has been going on these last few weeks/months before good ol’ 2012 comes to an end. I plan to start off this new year with many brilliant and ripe opportunities. So to keep you occupied in the meantime is a video of me singing Kari Jobe’s song “The More I Seek You.”


Until next time,

Kalah


A Servants Heart, A Sinners Dagger

22 Oct

“Beware of the false prophets, who come to you in sheep’s clothing, but inwardly are ravenous wolves. You will know them by their fruits. Grapes are not gathered from thorn bushes, nor figs from thistles, are they? Even so, every good tree bears good fruit; but the bad tree bears bad fruit. A good tree cannot produce bad fruit, nor can a bad tree produce good fruit. Every tree that does not bear good fruit is cut down and thrown into the fire. So then, you will know them by their fruits” –Matthew 7:15-20

Hey Webbies,

I have always struggled with the thought of “why do bad things happen to good people?”  As a Christian, I know that we must set ourselves apart from this world. By doing this, it is an automatic target on our backs. People from all over will try to challenge you for what you believe in.

There are people in the world that thrive off the fact that there are good people in this world. Sometimes it is not that bad things happen to good people, as it is because we are “good” it affect us more than a non-believer.

What can I do as a Godly woman in my life that will help me grow more in Christ and not fall to the world? Personally, I am constantly editing people in and out of my life. If a certain person is bringing me down, they do not deserve a place in my life. We need to have people in our lives that bring us up and not hold us down. We have to keep our lives in check and constantly prune our lives to get rid of any sinful things that will taint our character.

So my advice today is to be aware of who you let into your life, do they affect you in a positive manner? Will they stop you from doing God’s will? Do you need more good fruits in your life?

Take action.

Until next time,

Kalah

Food 101: Chicken Cordon Bleu

2 Oct

Hey Webbies,

I have a treat for you.

I have currently been M.I.A. in the blogging scene for over two weeks. For those of you who are new readers or those who have missed my post about it, my mother had her leg amputated, by choice, and has since been in the hospital. This means I have been in charge of taking care of my niece.

Today, I decided that when she came home and finished her after school routine, I would recruit her to help make dinner. If I could see into the future, I would have seen it taking twice as long with her “helping” nonetheless this is our beginning, middle and finishing of our semi-homemade meal. Therefore, if you have not seen the title, tonight’s dinner feature was Chicken Cordon Bleu with Chicken flavored Vermicelli rice and mixed veggies.

First, we started gathering all of the ingredients and equipment we would need.

Ingredients:

  • 3 chicken breasts (skinless and boneless)
  • Shredded/slices Cheese (your choice)
  • Ham (We used  lunch meat)
  • 1/4 cup all-purpose flour
  • Salt and pepper
  • 1/2 cup bread crumbs (We used Italian)
  • 2 tbs. Garlic (We used minced from the jar)
  • 2 Tbs unsalted butter, melted
  • 2 eggs
  • Extra-virgin olive oil
  • We also made boxed rice and frozen veggies

Equipment:

  • Large stove/oven safe pan (We used a Cast-iron Skillet)
  • Medium pot with lid (for Rice)
  • Wax paper
  • Meat mallet
  • Apron
  • Knife, bowls, cutting board, utensils, etc.

Directly after snapping the picture above the meat mallet fell and…. well see for yourself…

After promptly cleaning the egg-y mess up and disinfecting everything, I started to clean the chicken. Some might feel this step unnecessary however, my O.C.D tendencies compel me to do this step with complete accuracy or I will not be able to eat the chicken.

In addition, cooking this meal made me realize that raw chicken and ham are the least photogenic foods that I have eaten, so without further due:

Finally! The Chicken is clean.

**IMPORTANT NOTICE: Please avoid cross contamination when handling the Chicken and Eggs**

When the chicken is to your liking, make a sandwich out of each chicken piece using the wax paper. I will look something like this.

Now here comes the fun part especially if you have little helping hands. Take the meat mallet and even the chicken out to about 1/4” in thickness. You might need to take over after their smashing fun to make the correct thickness.


Once my niece made sure the chicken was dead, as she put it, I placed the chicken back on the cutting board to our “assembly station.”  First, we put down the ham (one or two pieces) and a bit of cheese.


After placing the ham and cheese on the chicken comes the tricky part, rolling it up without everything falling out. Then we mixed the salt, pepper, and flour together and dipped the rolled up chicken in it (make sure it is all over.) Then from there dip it in the eggs followed by the next bowl, which is the breadcrumbs. This is somewhat of what it should look like:


Next, I sprayed Pam on the skillet and positioned it on the burner heating it on medium. Carefully, place the chicken in the skillet so it does not fall apart. Now is the time I put the butter and oil into the skillet along with the garlic and swish is around with a spoon to go around/in-between the chicken (I sprayed the top of the chicken with Pam so the crumbs would get crispy.)


After the oil is hot, place it in the oven at 375° for 25 minutes.

The garlic with blacken and caramelize, do not get alarmed this is normal.

After 25 minutes is up this is my result.

Our dinner was completed and served to a ravenously hungry helper. After the stuffed helper cleared her plate like a vacuum, I asked how she would suggest on making it better.

I honestly thought she would have hated this recipe for the simple fact it was something she never ate before. She answered, “More cheese and more breading!”

After failing to get any more critique out of her, I asked her to describe it in one word and my little picky eater said exuberantly, “Delicious!”


I thought my Chicken Cordon Bleu turned out amazing. The chicken was surprisingly moist on the inside while obtaining a crunchy crisp to the outside breaded layer. We ate our chicken with vermicelli rice and veggies. Food 101 = Success.

I really hope you enjoy this recipe and look forward to posting many more in the future.

If you try it out send me a picture of how yours turned out.

Did you switch up the recipe? Did something go wrong like my egg becoming Humpty-Dumpty?

Until next time,

Kalah